0%

在给app的网络请求添加loading过程中,发现一个封装更加完善的网络三方库,里面有很多值得借鉴的细节,特此记录

优点:

  • 默认自带loading,如果单个请求不想要loading,可以传递参不显示,自己封装的目前全部显示loading
  • 更加友好的控制台json打印
  • 封装了公共参数
  • 响应拦截

来源:https://github.com/po1arbear/Flutter-Net

地址:https://github.com/kokohuang/flutter_easyloading

用法,添加到materialApp的builder属性中

1
2
3
4
5
6
7
8
9
10
11
12
13
14
class MyApp extends StatelessWidget {
// This widget is the root of your application.
@override
Widget build(BuildContext context) {
return MaterialApp(
title: 'Flutter EasyLoading',
theme: ThemeData(
primarySwatch: Colors.blue,
),
home: MyHomePage(title: 'Flutter EasyLoading'),
builder: EasyLoading.init(),
);
}
}

接下来在任何地方调用

1
2
3
4
5
6
7
8
9
10
11
12
13
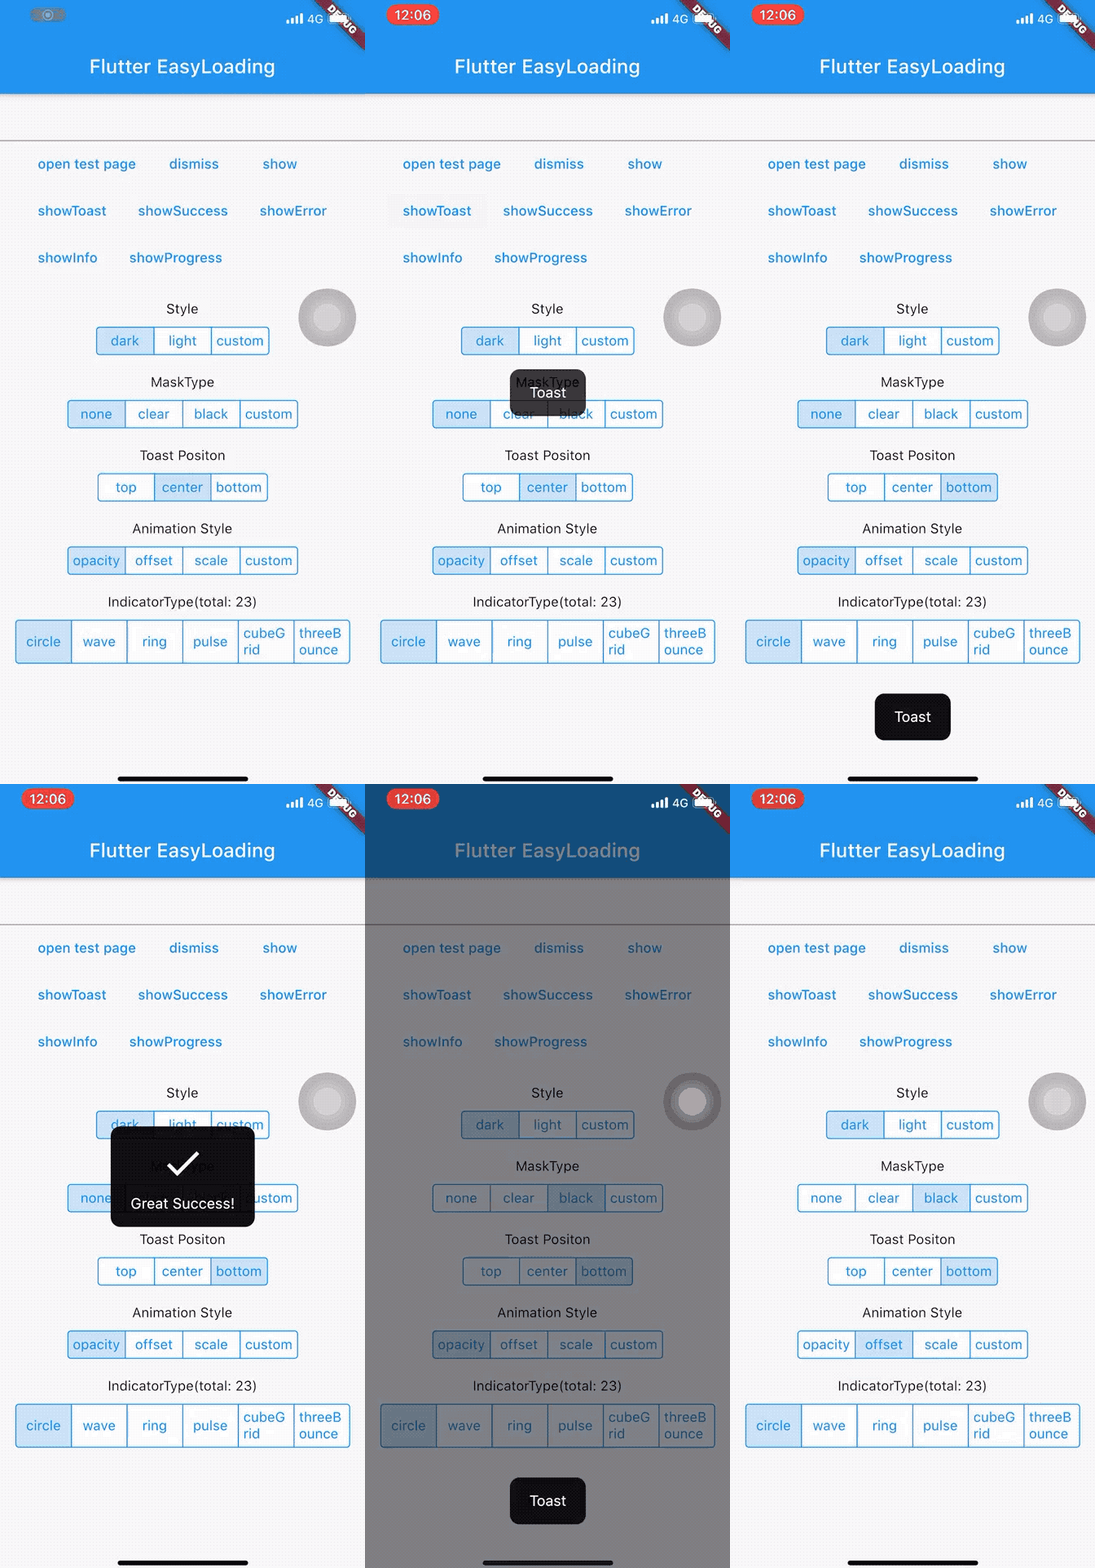
EasyLoading.show(status: 'loading...');

EasyLoading.showProgress(0.3, status: 'downloading...');

EasyLoading.showSuccess('Great Success!');

EasyLoading.showError('Failed with Error');

EasyLoading.showInfo('Useful Information.');

EasyLoading.showToast('Toast');

EasyLoading.dismiss();

示例图片

image

如果一个组件没有调整内边距的属性,那么可以在它的外层加一层Padding,达到调整位置的效果,效果等同于放到Container里,比Container更轻量级

1
2
3
4
Padding(
padding: EdgeInsets.all(10),
child: Text('这是一段测试文字'),
)

该组件可以用在container和card组件里,默认有大标题和小标题属性,无需再进行text上下排列组合

1
2
3
4
5
6
7
8
9
10
11
12
13
14
15
16
Card(
margin: EdgeInsets.all(10),
child: Column(
children: <Widget>[
ListTile(
title: Text("张三",style: TextStyle(fontSize: 28)),
subtitle: Text("董事长"),
),
Divider(),
ListTile(
title: Text("电话:123456789"),
),
ListTile(title: Text("地址:xxxxxxxxxxxxxxxxx"))
],
),
),

image

在开发过程中,Container组件使用多了,会有一些重复的代码,比如矩形边框和圆角,需要额外加decoration,使用card已经默认加上了边框和阴影

1
2
3
4
Card(
margin: EdgeInsets.all(10),
child: ...
)

在一个数组容器里放置两个及其以上radio,当radio的group value和自己value相等时,便是选中状态

1
2
3
4
5
6
7
8
9
10
11
12
13
14
15
16
17
18
19
20
21
22
23
24
25
26
27
28
29
int groupValue = 1;
_onChange(value){
if(mounted)
setState(() {
groupValue = value;
});
}

Row(

mainAxisAlignment: MainAxisAlignment.center,
children: <Widget>[
Radio(
value: 1,
groupValue: groupValue,
onChanged: (T) => _onChange(T),
),
Radio(
value: 2,
groupValue: groupValue,
onChanged: (T) => _onChange(T),
),
Radio(
value: 3,
groupValue: groupValue,
onChanged: (T) => _onChange(T),
),
],
)

参考:https://blog.csdn.net/zhangwes/article/details/104978660

取用圆角类的only属性,左上,右上,左下,右下,此处圆角半径也是一个类

1
2
3
4
BorderRadius.only(
topLeft: Radius.circular(8.w),
topRight: Radius.circular(8.w),
)

全部圆角则取all

1
2
3
BorderRadius.all(
Radius.circular(8.w)
)

在listview或gridview中,用index去获颜色,挨个取一遍

1
Colors.primaries[index % Colors.primaries.length]

首先自己写好模型类模板代码

1
2
3
4
5
6
7
8
9
10
11
12
13
14
15
16
import 'package:json_annotation/json_annotation.dart';
part 'buy_record_data.g.dart';

///标志class需要实现json序列化功能
@JsonSerializable()
class BuyRecordData {
///属性
List<BuyRecordEntity> entities;
/// 构造函数
BuyRecordData(this.entities);
/// 这个函数在.g.dart中,命名就是类名+FromJson
/// 直接写就行 报错也没关系 生成.g.dart文件之后就好了
factory BuyRecordData.fromJson(Map<String, dynamic> json) =>
_$BuyRecordDataFromJson(json);
Map<String, dynamic> toJson() => _$BuyRecordDataToJson(this);
}

然后在终端运行,生成.g.dart文件

1
2
flutter packages pub run build_runner build --delete-conflicting-outputs

参考:1. https://blog.csdn.net/YoYo_Newbie/article/details/90634878?utm_medium=distribute.pc_relevant_t0.none-task-blog-BlogCommendFromBaidu-1.control&depth_1-utm_source=distribute.pc_relevant_t0.none-task-blog-BlogCommendFromBaidu-1.control

  1. https://my.oschina.net/u/4326108/blog/3675231

  • 渲染过程会生成三棵树

    • widget树

    • element树

    • render object树

  • 提高buid效率,在build方法中尽量少做事,层级越简单越好
  • setState方法尽量下放到底层节点
  • 尽量减少重绘区域,使用repaint boundry
  • 减少离屏渲染 比如save layer,clip path,
  • 减少透明度使用,因为每一帧都会重建widget
  • 建立缓存池
  • 提升layout效率

参考:https://www.freesion.com/article/8834628331/